New Year Box - Anleitung für den Zusammenbau
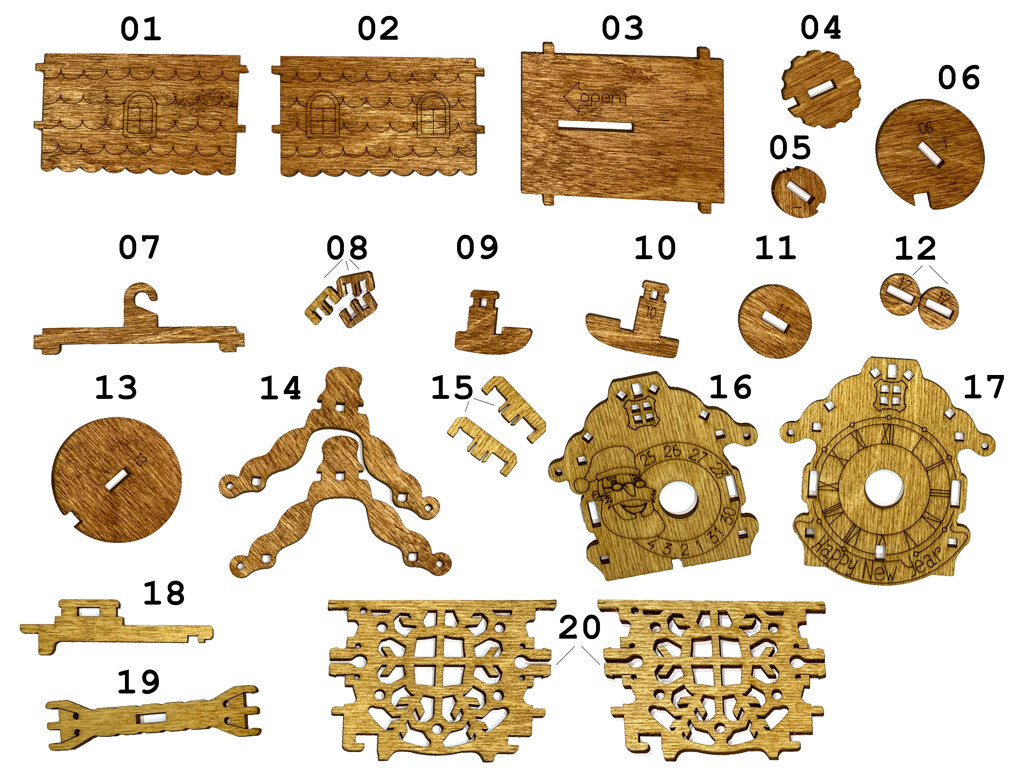
Components:
1x part of the roof 01 (1 window)
1x part of the roof 02 (2 windows)
1x bottom 03
1x cogwheel 04
1x wheel 05 (has a notch and curve edges)
1x wheel 06 (has a notch)
1x hanger 07
2x small fasteners 08 (+1 spare)
1x back handle 09
1x front handle 10
1x wheel 11
2x wheels 12
1x wheel 13
2x roof rakes 14
1x large fastener 15 (+1 spare)
1x back 16 (Santa)
1x front 17 (clock)
1x bottom lock 18
1x roof ridge 19
2x walls 20
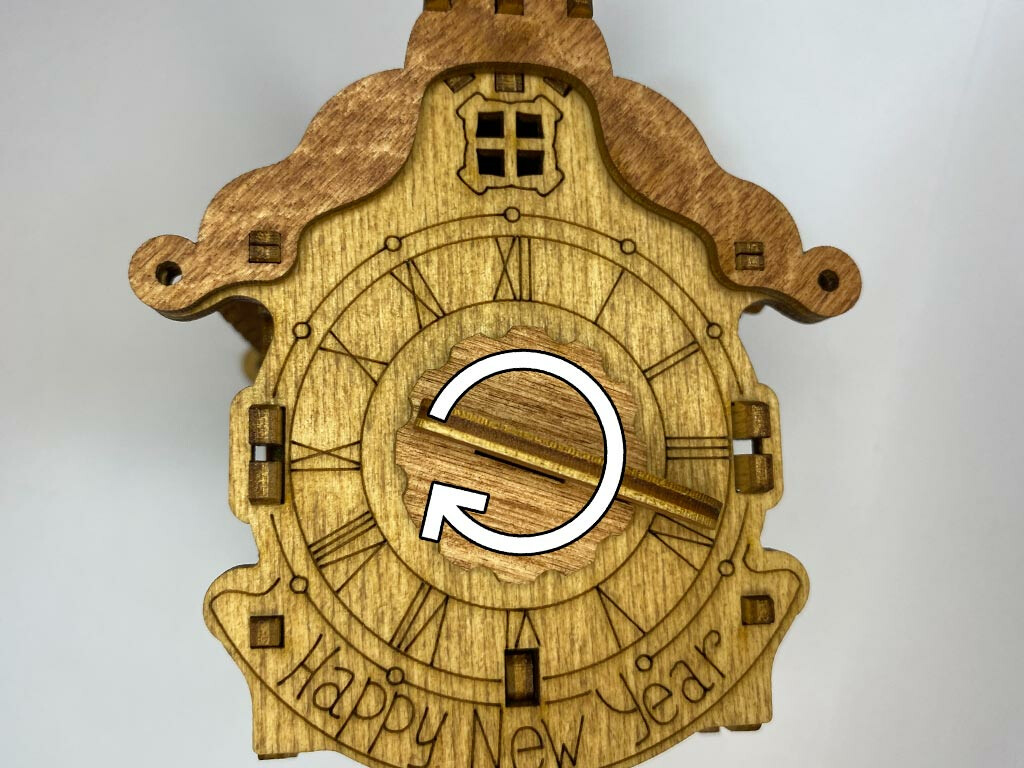
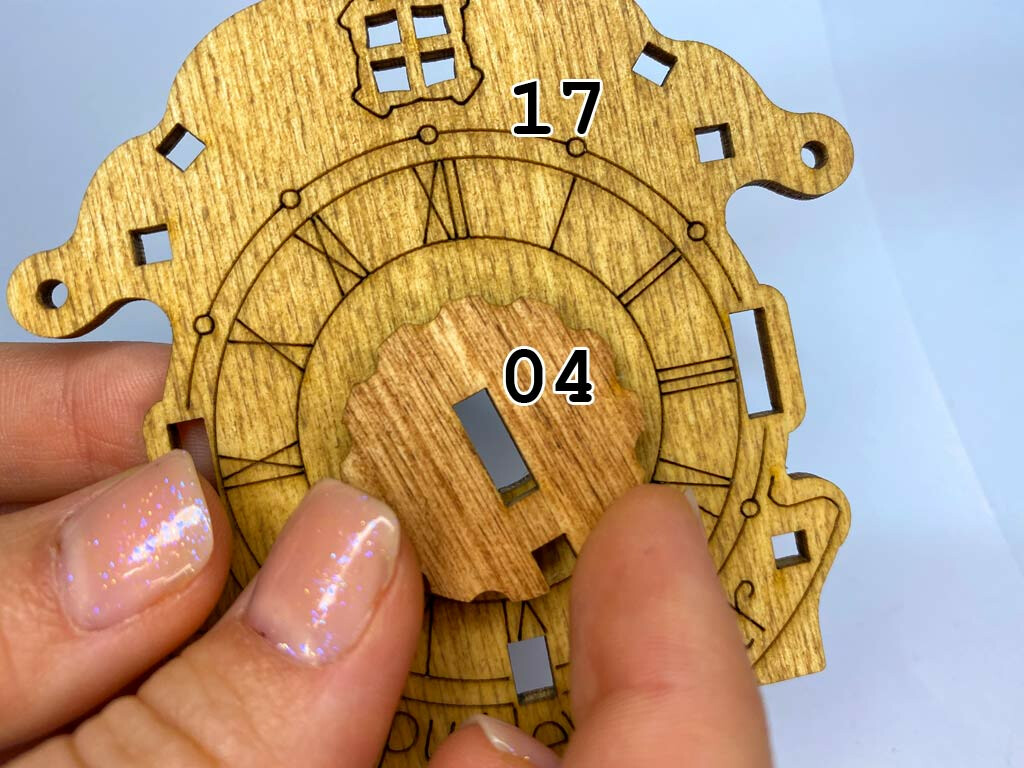
Put the cogwheel (04) onto the front part 17 (clock).
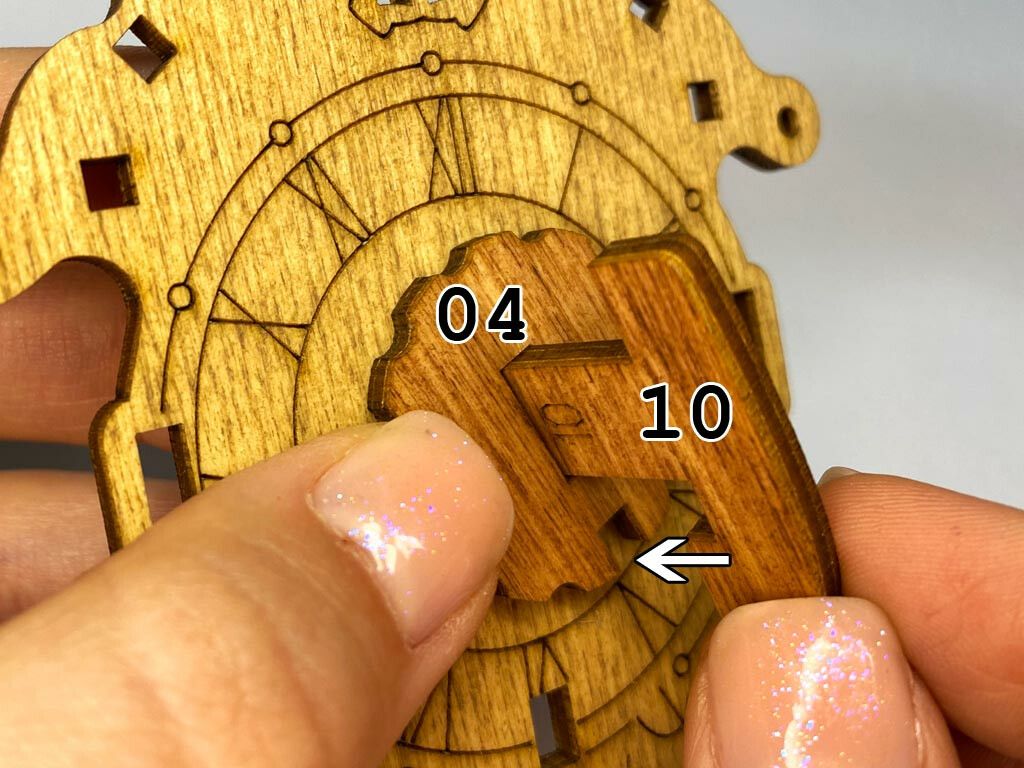
Then place the handle (10). Check that the handle comes into the hollow on the cogwheel.
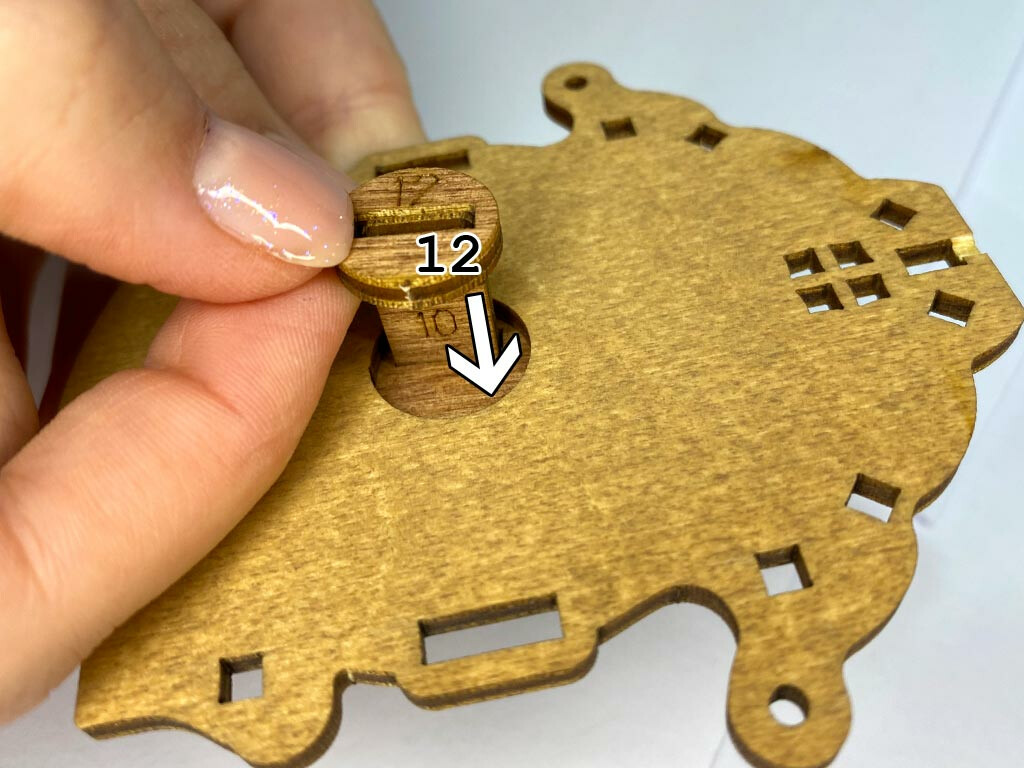
Turn over the clock and insert three wheels on the other side:
1) small wheel 12
2) wheel 11
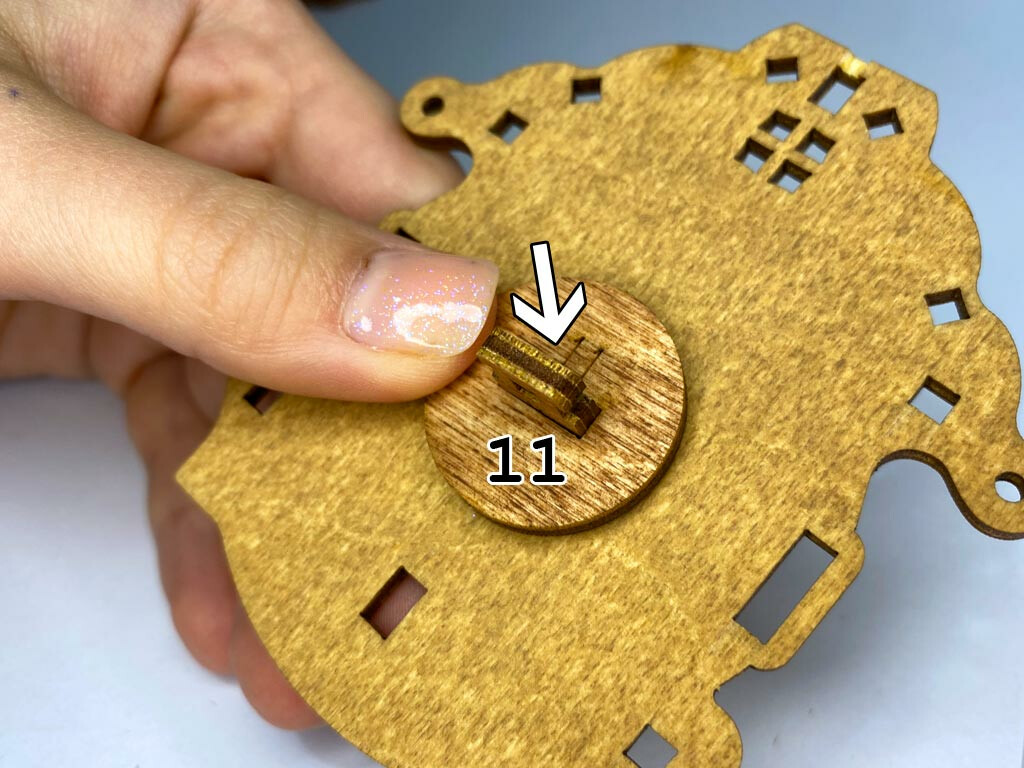
3) large wheel 13
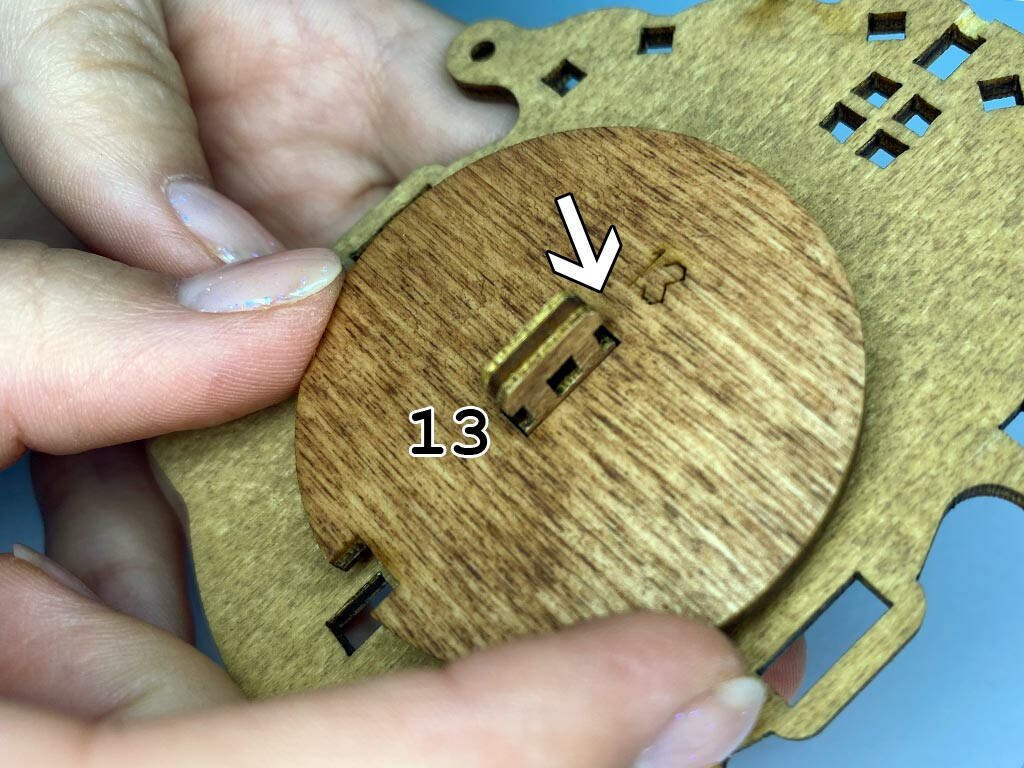
IMPORTANT: wheel 13 should be placed so that its hollow points to the OPPOSITE direction from the handle on the other side. In the example below the handle points up while the wheel’s hollow points down.
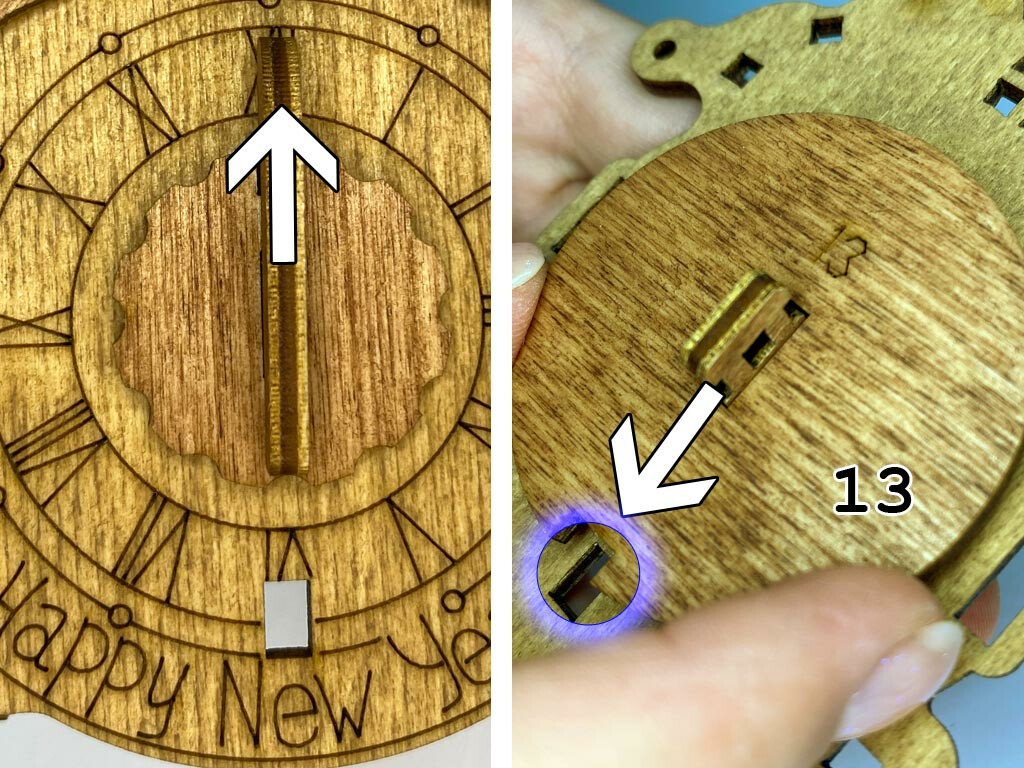
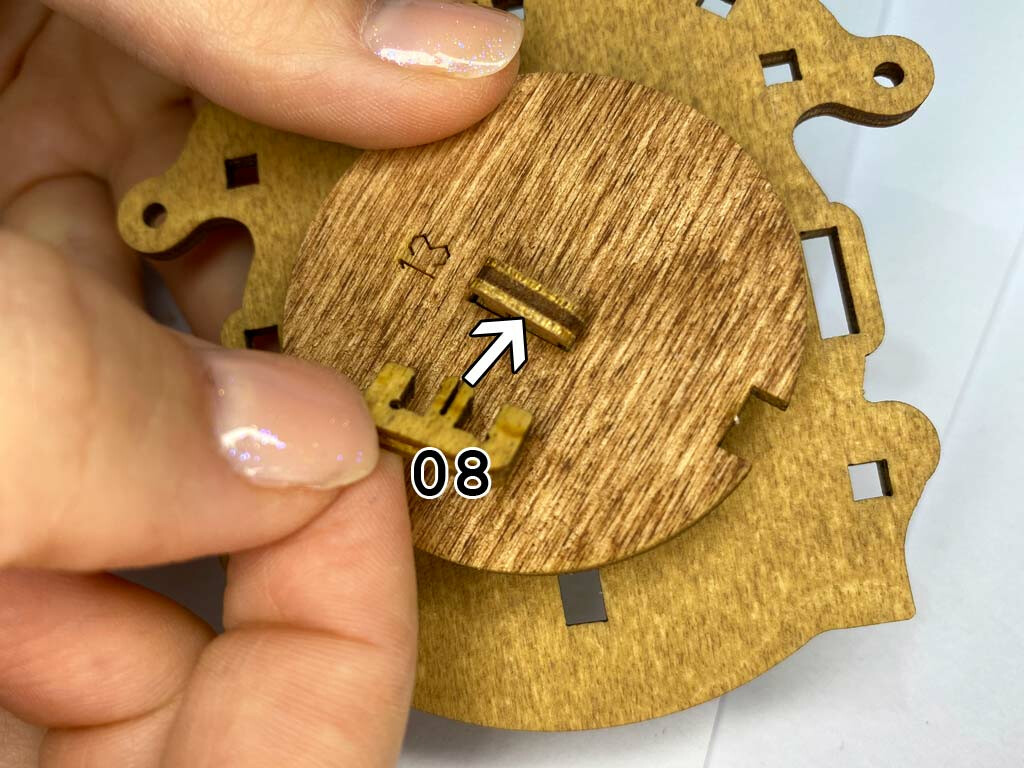
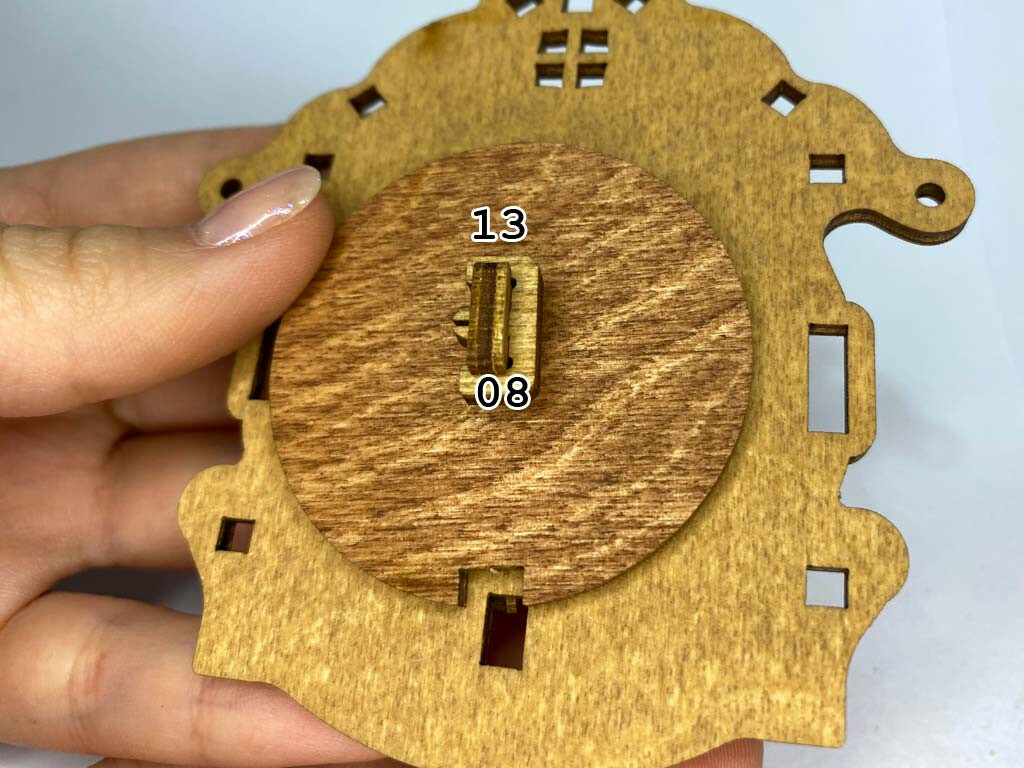
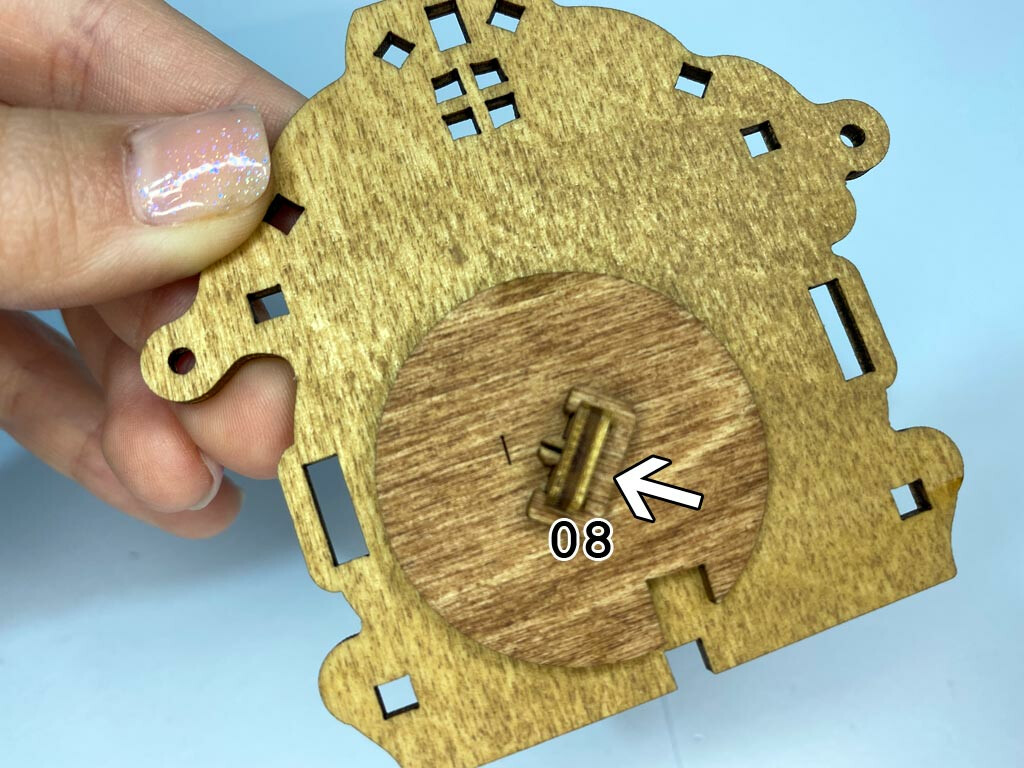
Insert the small fastener (08) to fix the wheels.
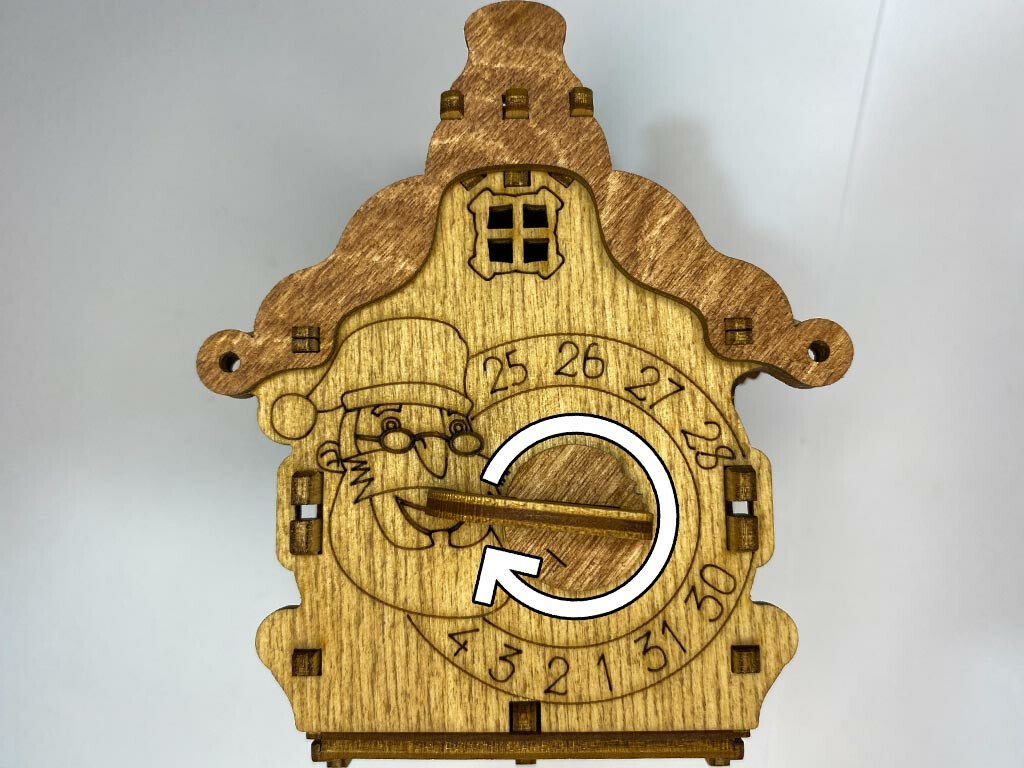
Put the wheel 05 (it has a small notch) onto the back part (16). Note: you should put it so that its edges fit the edges of Santa’s beard, while the small vertical notch is located on the right.
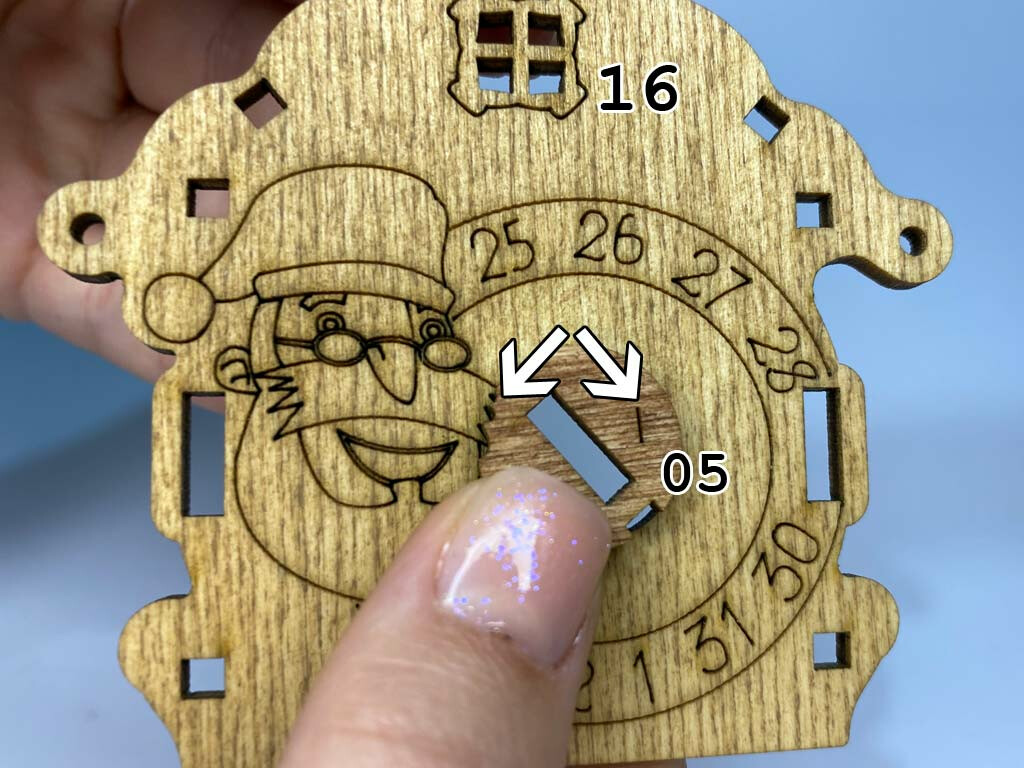
Then place the handle (09). Check that the handle comes into the hollow on the wheel.
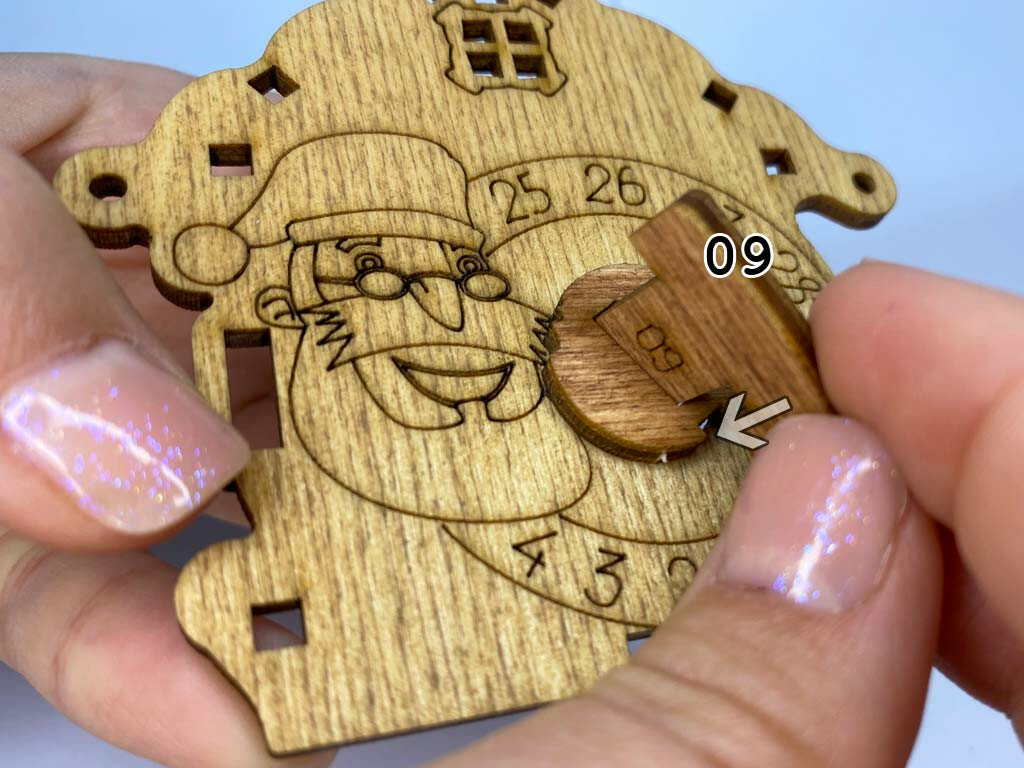
Turn over the construction. Insert the small wheel (12) and then wheel 06 on the other side.
IMPORTANT: The hollow on the wheel should point to the hollow at the bottom, while the vertical notch is located on the top left. Also make sure that the same small notch on the wheel 05 on the other side is located on the right.
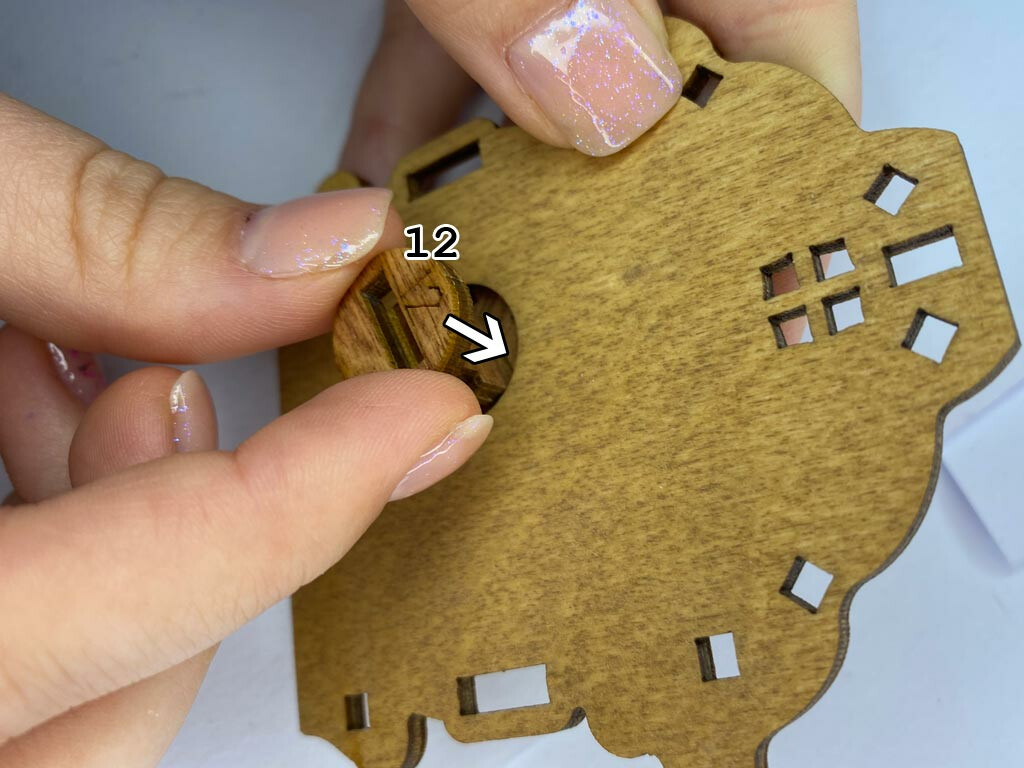
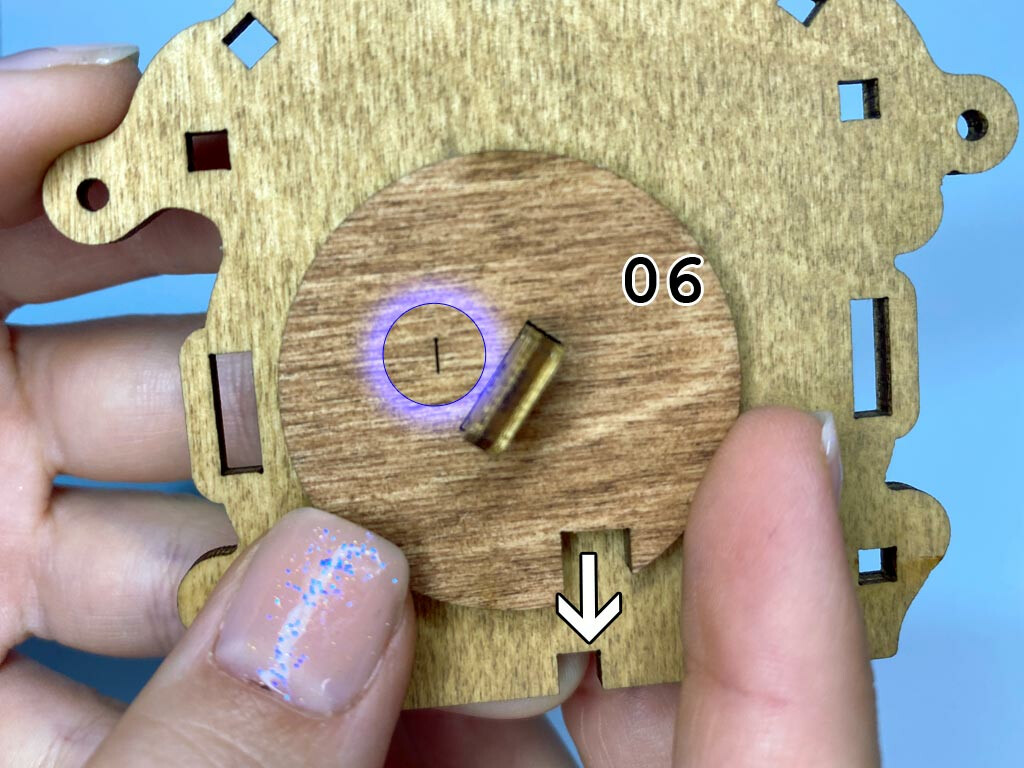
Fix it with the small fastener (08).
Join the walls (20) to the front (clock).
IMPORTANT: Please, make sure the bottom of the wall is positioned exactly as shown in the photo below.
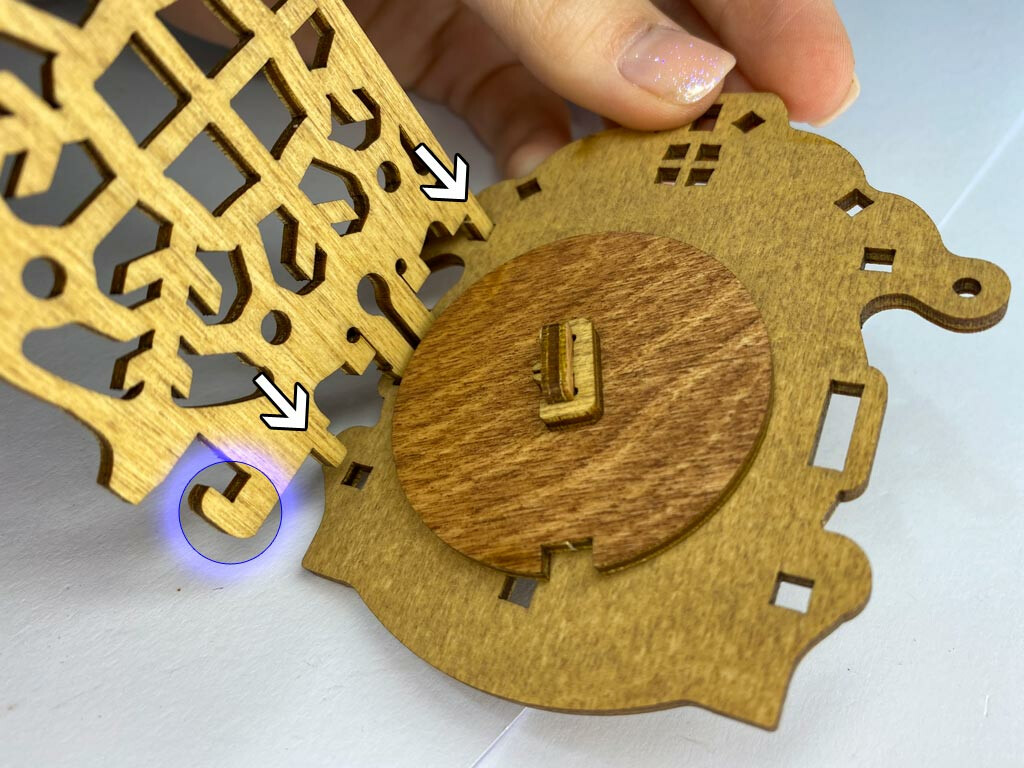
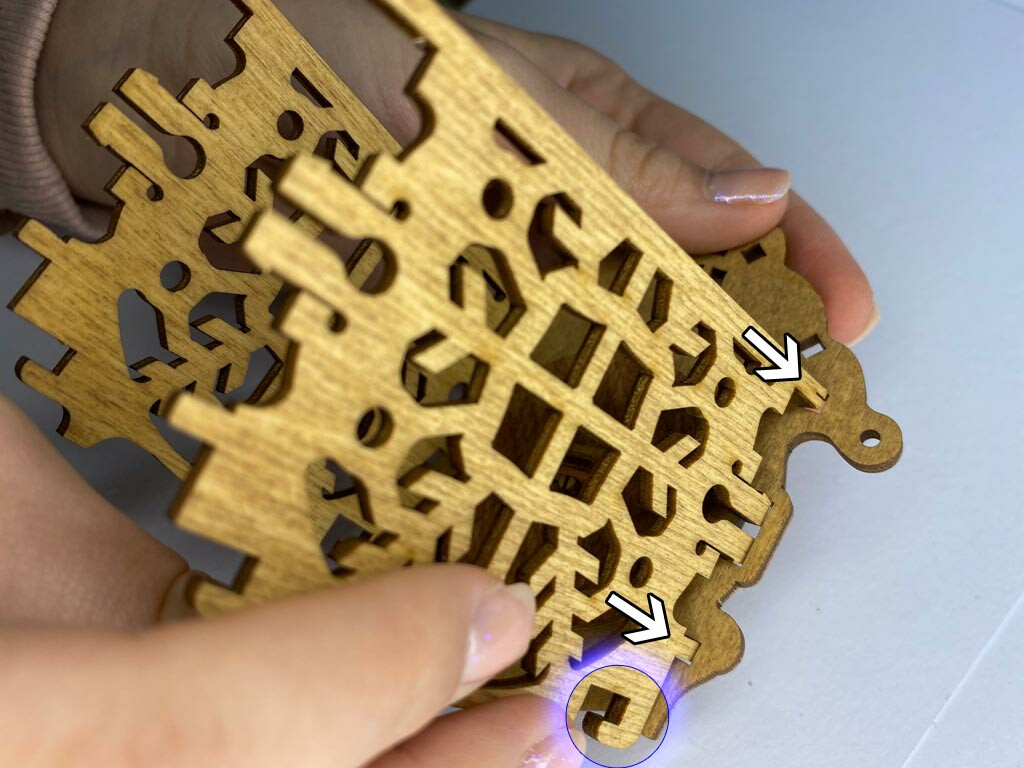
Join the roof that has 2 windows to the right and the roof that has 1 window to the left.
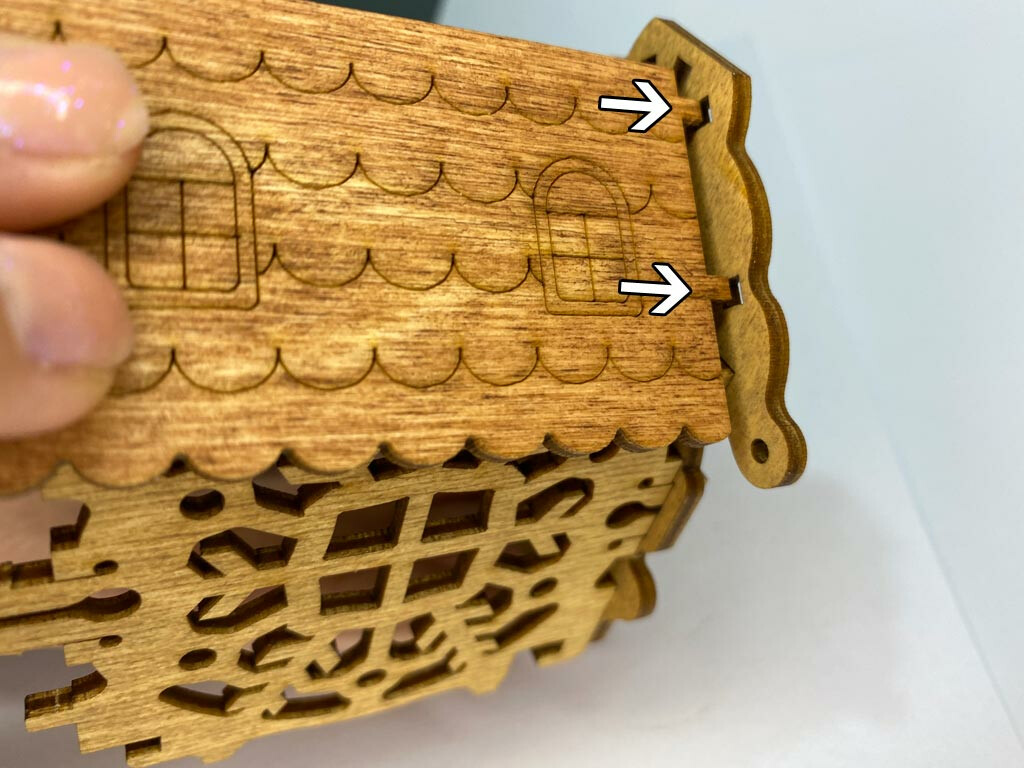
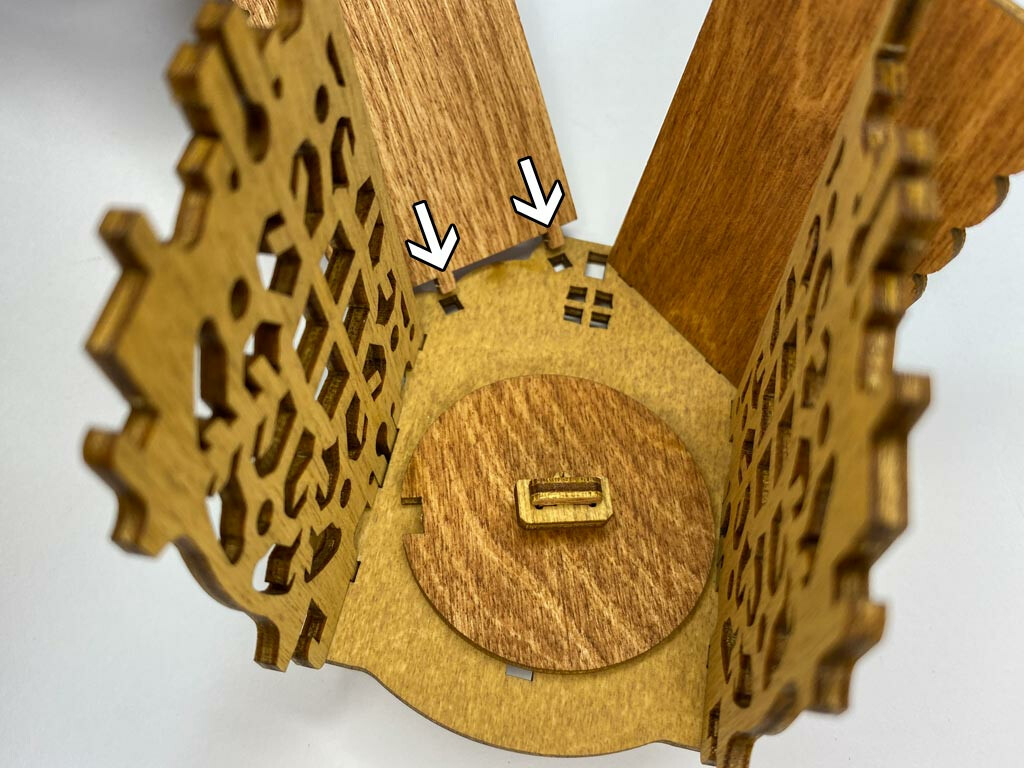
Attach the back (Santa) but leave one side of the roof unattached.
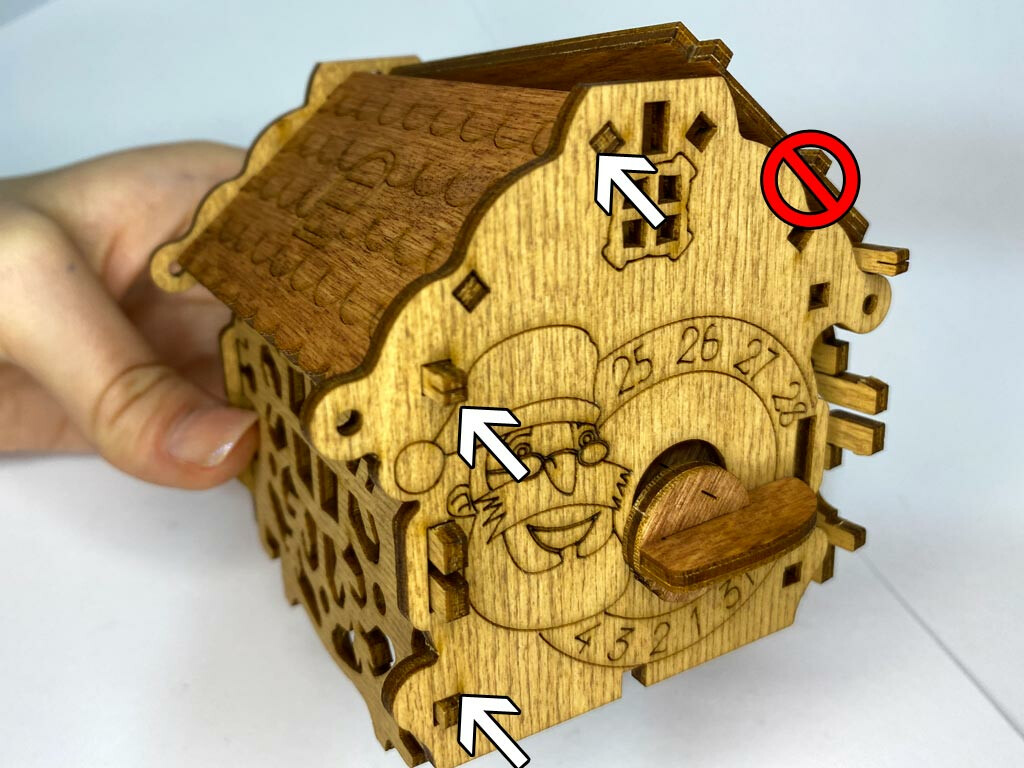
Insert the hanger (07) on top, then attach the second part of the roof.
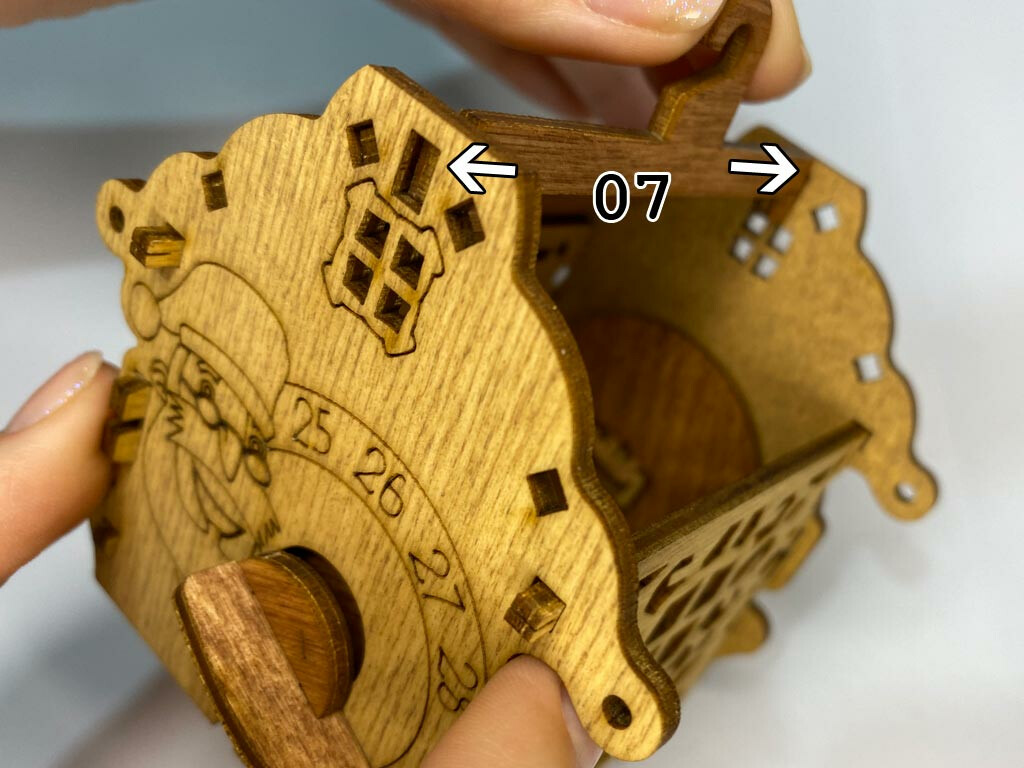
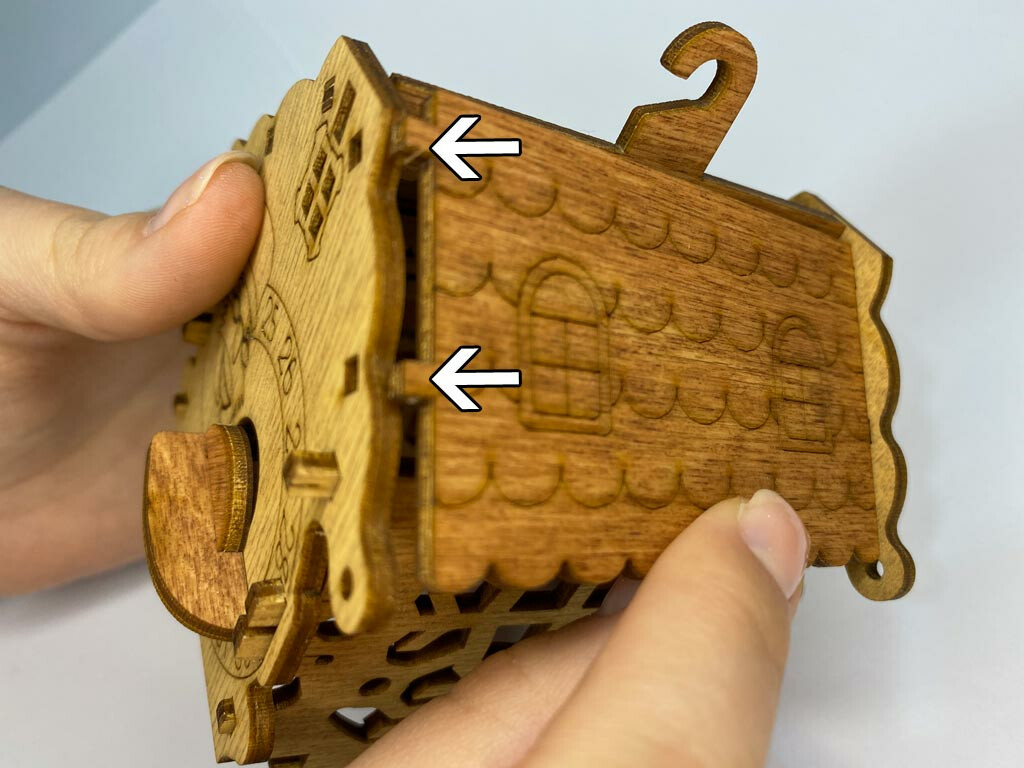
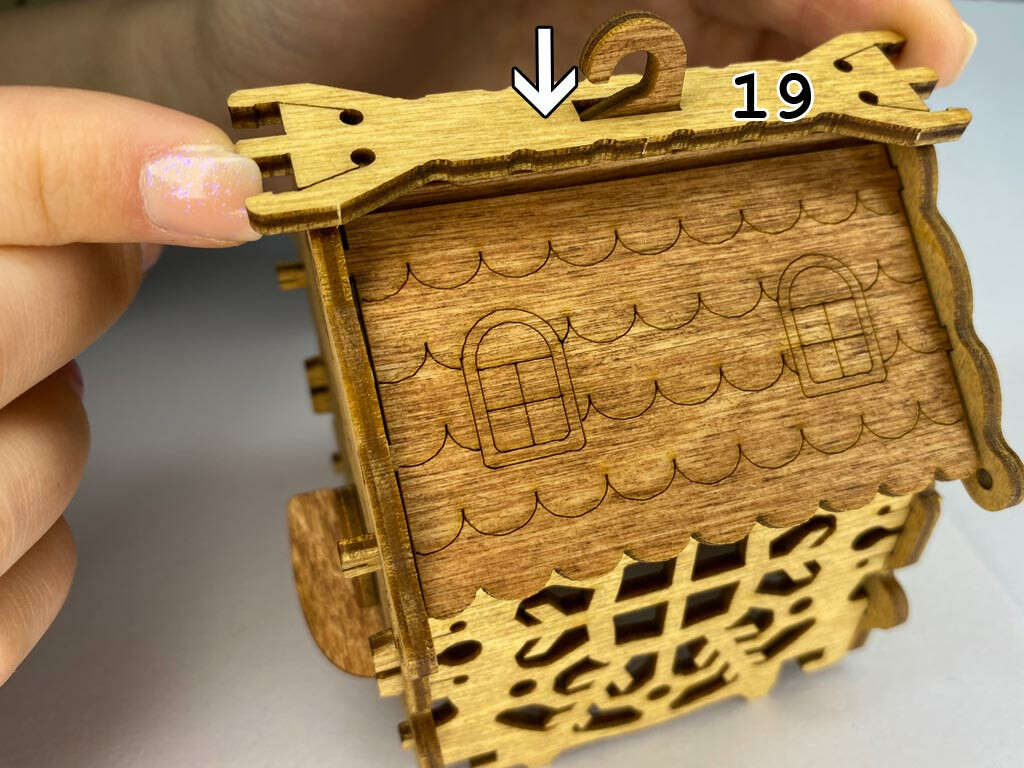
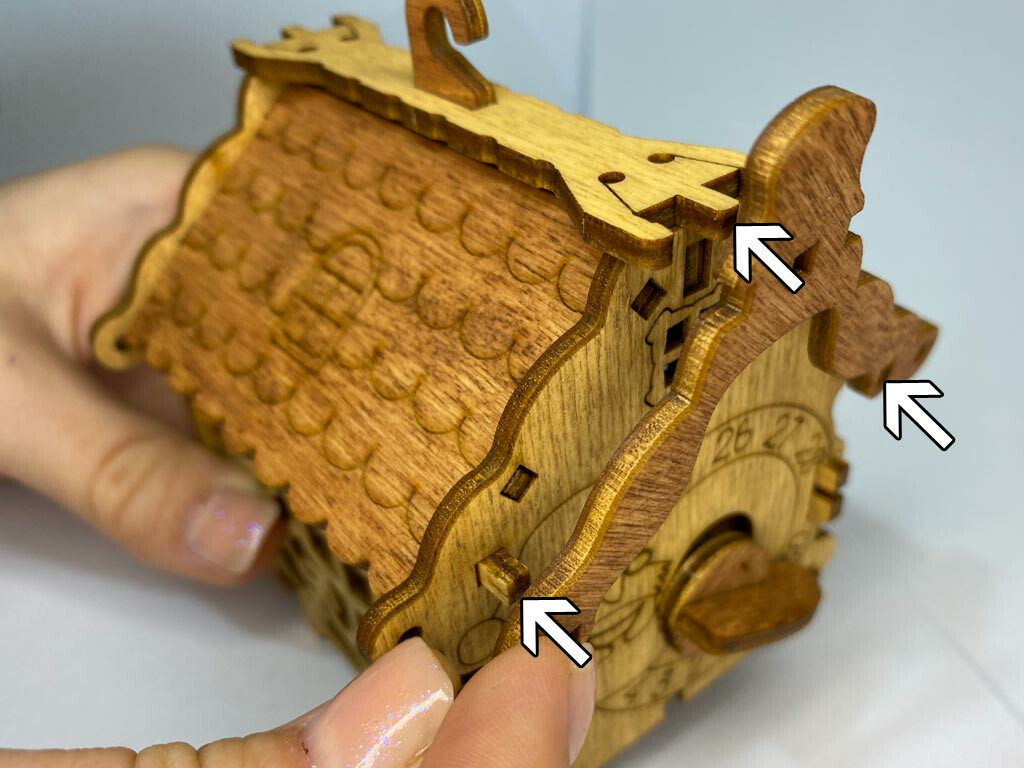
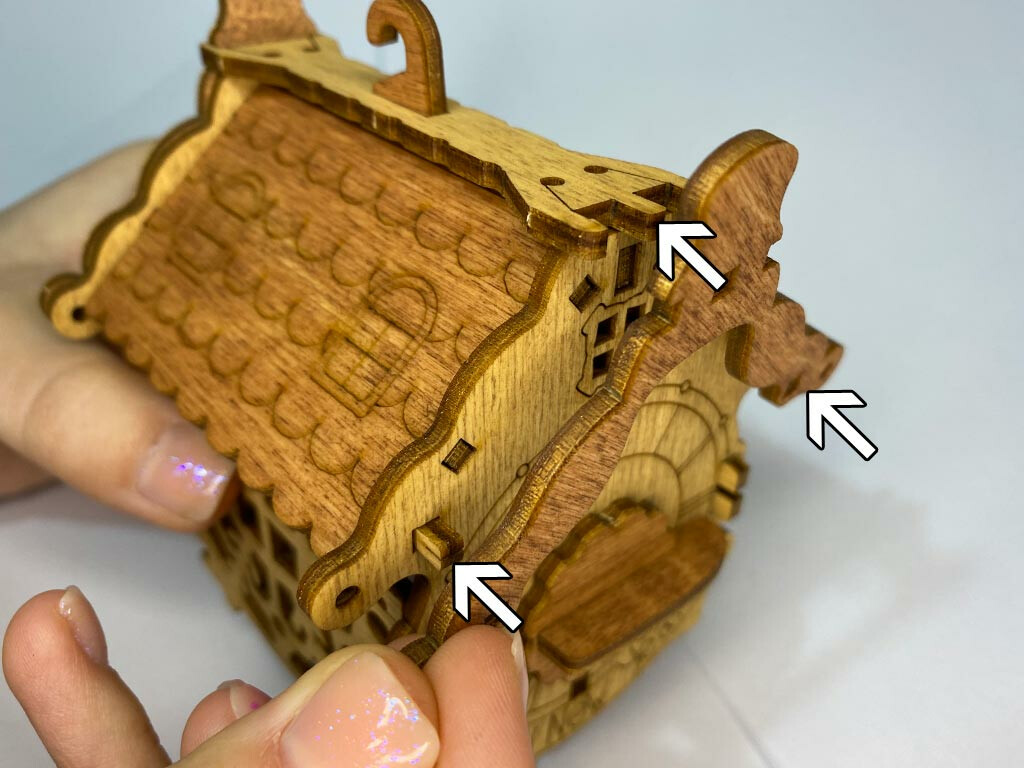
Place the roof ridge (19) on top and attach the roof rakes (14) to the front and the back.
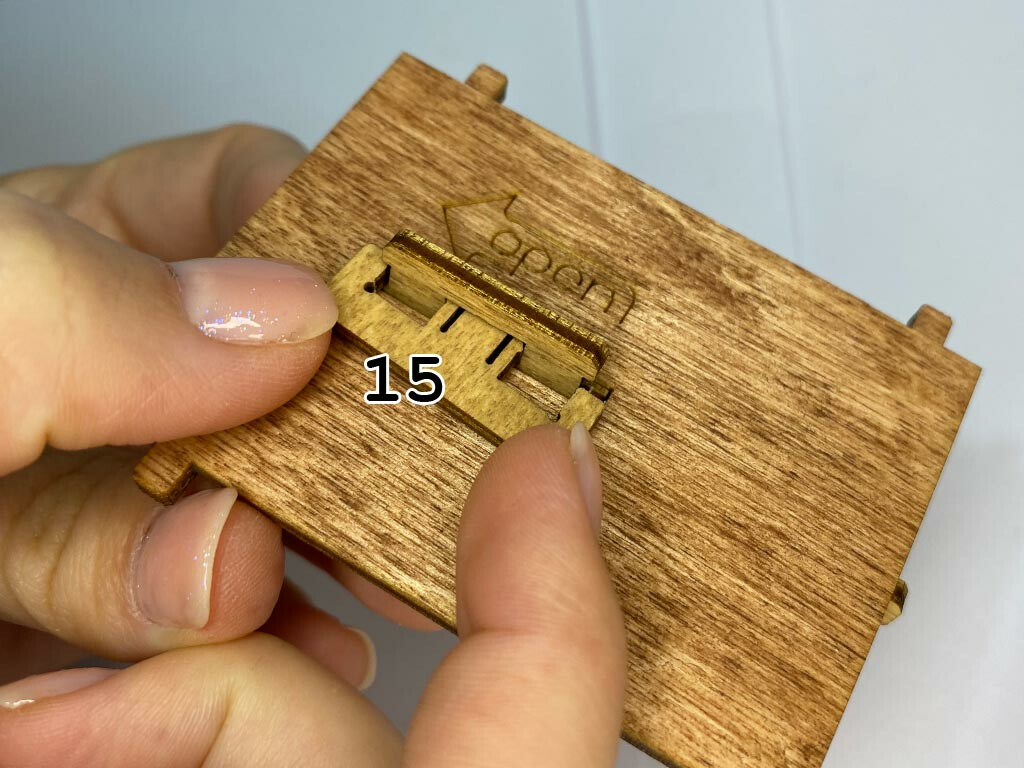
Join the lock (18) to the bottom (03) as shown below.
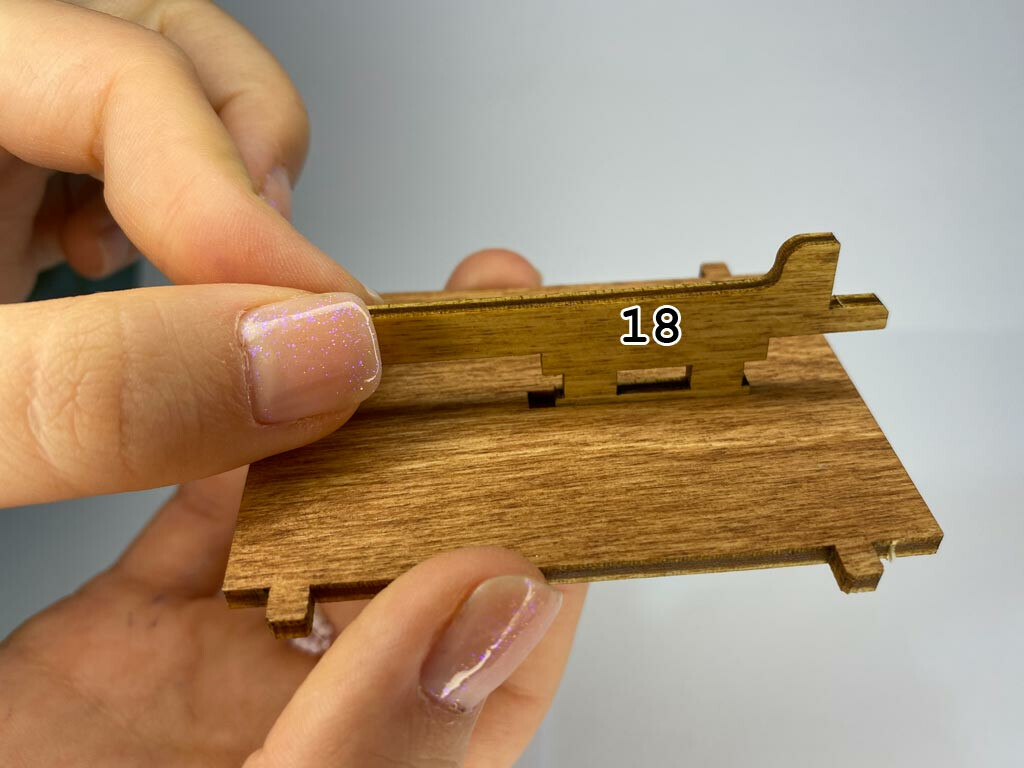
Fix them with the large fastener (15).
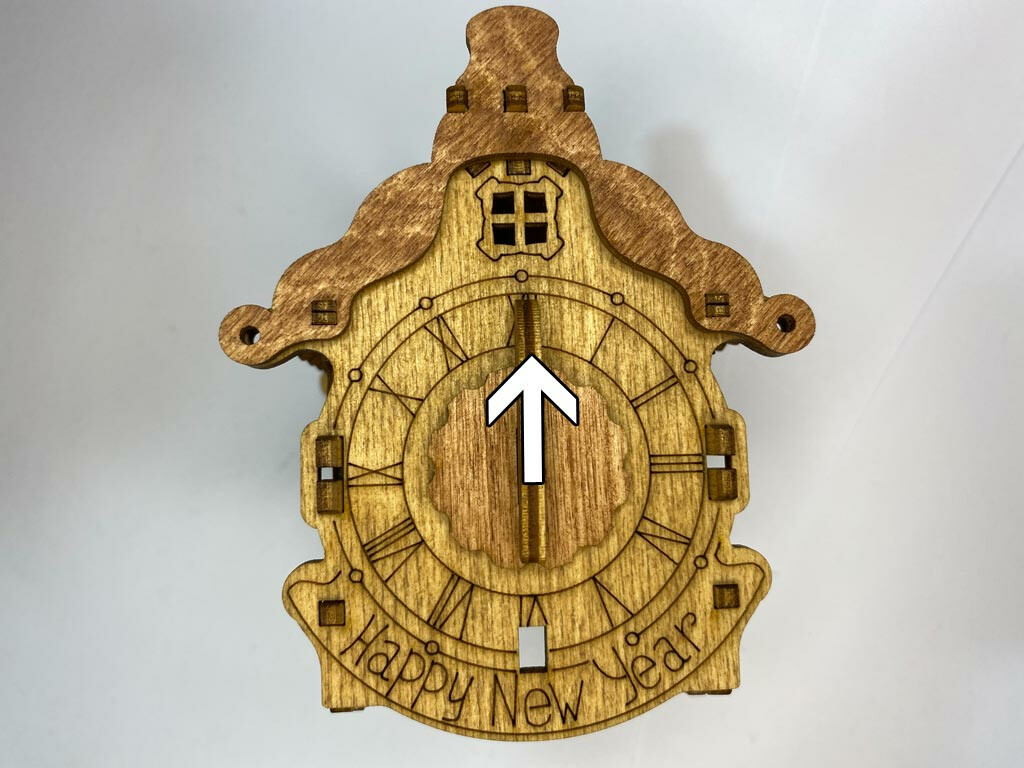
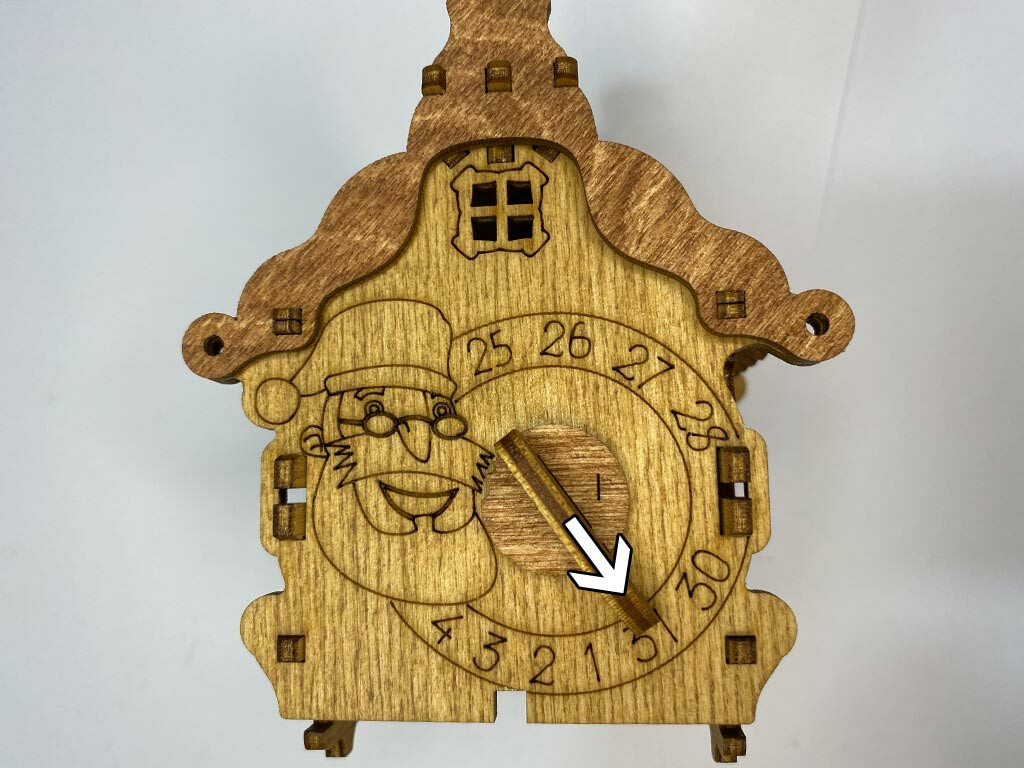
Turn the knob on the clock (front) to set “XII”, then turn the knob on Santa’s calendar (back) to set “31” – this is how the box unlocks.
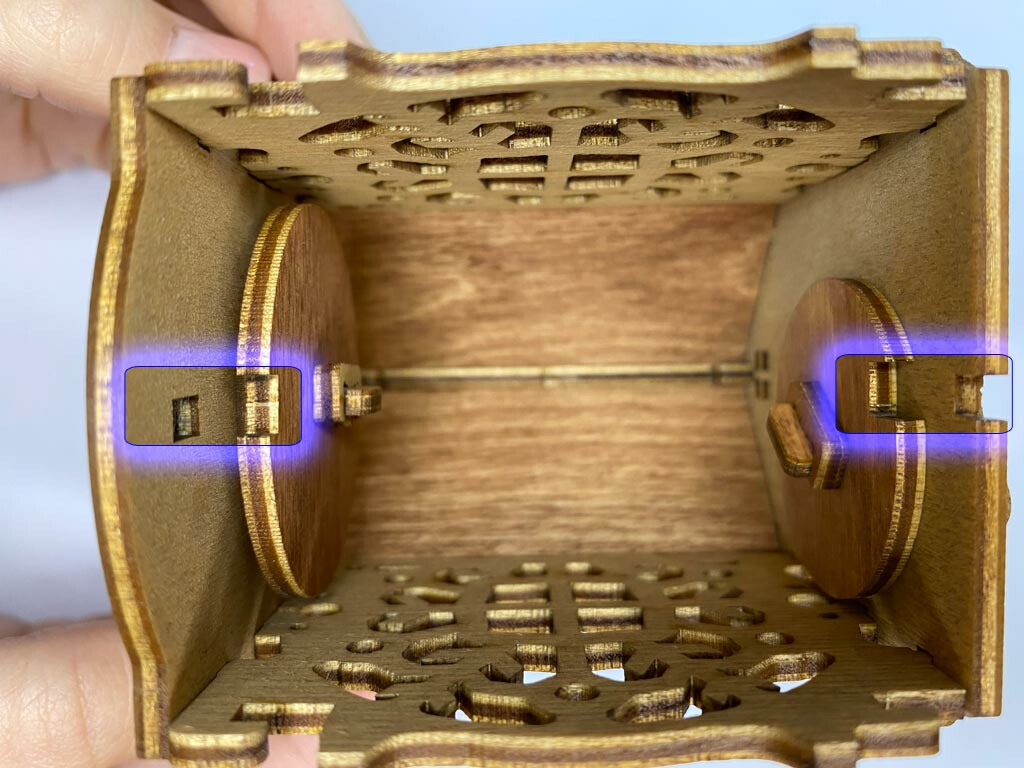
Look inside the hut. If everything has been done correctly, you will see that the hollows on the wheels point to the hollows in the front and in the back. See the photo below (upside-down view).
- If it is all right, go on to the next step.
- If the hollows don’t match, most probably you’ve failed to follow important notes during step 2 or 3 and now you should disassemble the hut carefully and rebuild it.
Place the bottom and push it to close.
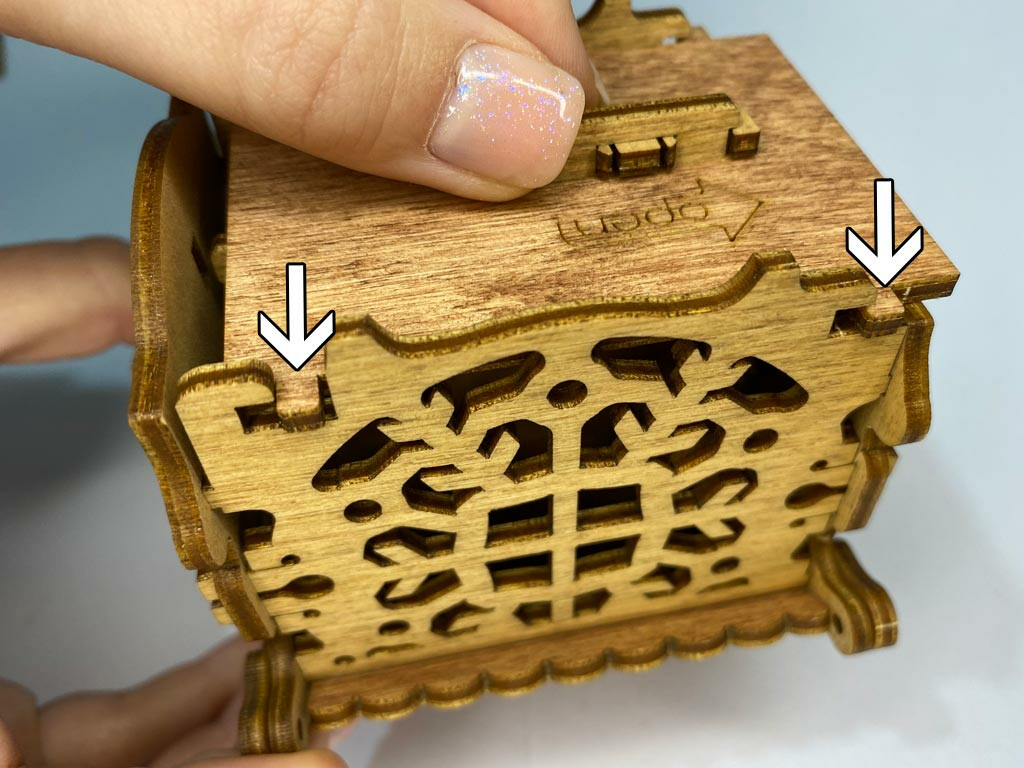
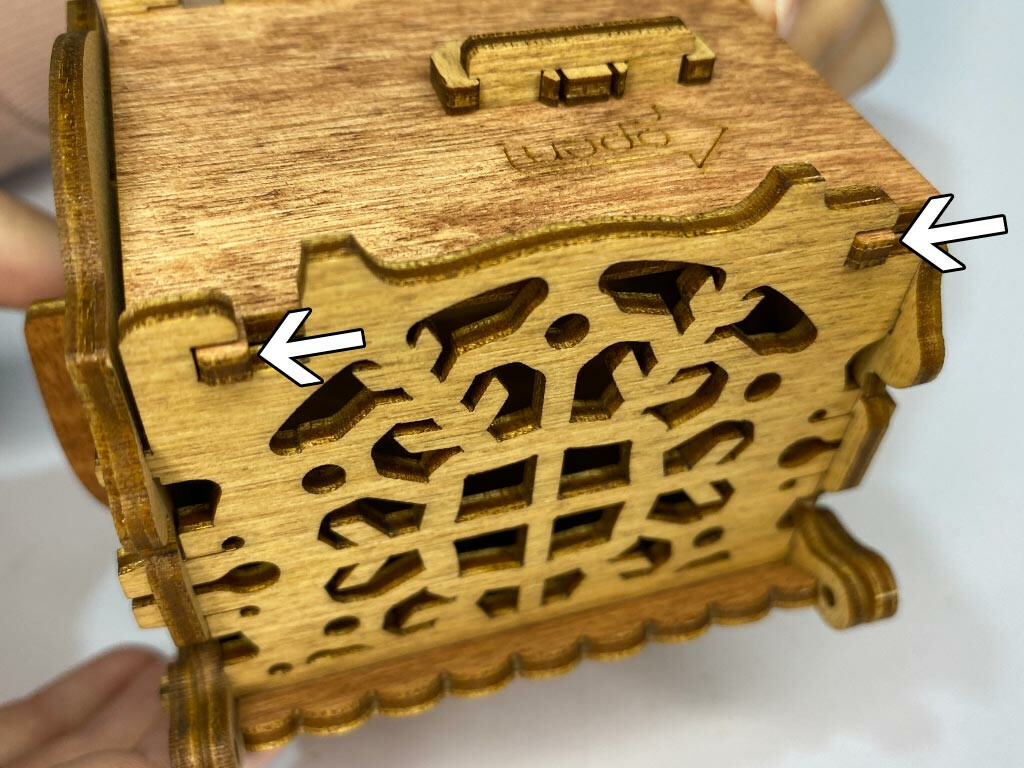
Lock the bottom by setting random values on the clock and on the calendar.
